As an avid explorer of the Living Lands, I've spent countless hours uncovering the secrets of Dawnshore and the Emerald Stairs. One of the most persistent and rewarding challenges for any adventurer like myself are the enigmatic Pargrun Caches. Scattered across the regions, these structures house some of Avowed's most intricate puzzles and valuable treasures. But let's be honest, which one truly tests our mettle? The Shatterscarp Pargrun Cache, without a doubt. Its reputation for daunting puzzles is well-earned, promising three or more chests to those cunning enough to solve its riddles. Today, I'm here to share my firsthand account and detailed walkthrough for conquering this formidable vault and claiming every last piece of loot it guards.
Locating the Shatterscarp Cache
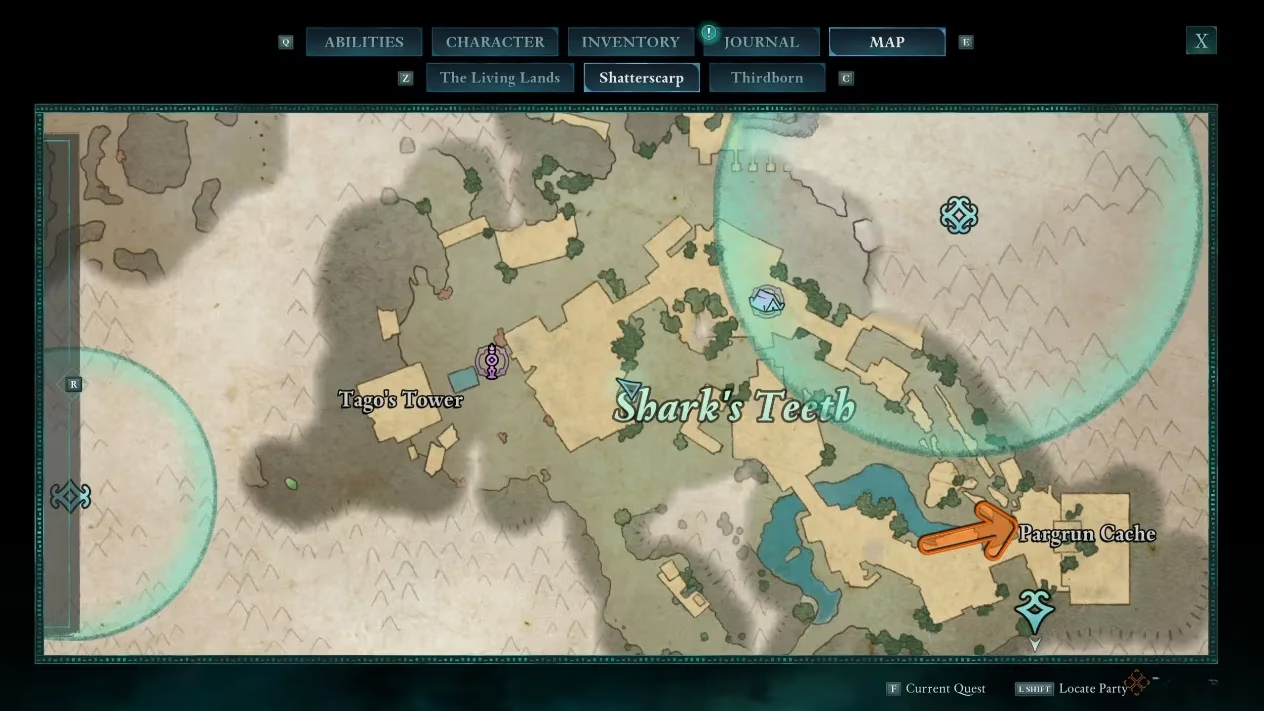
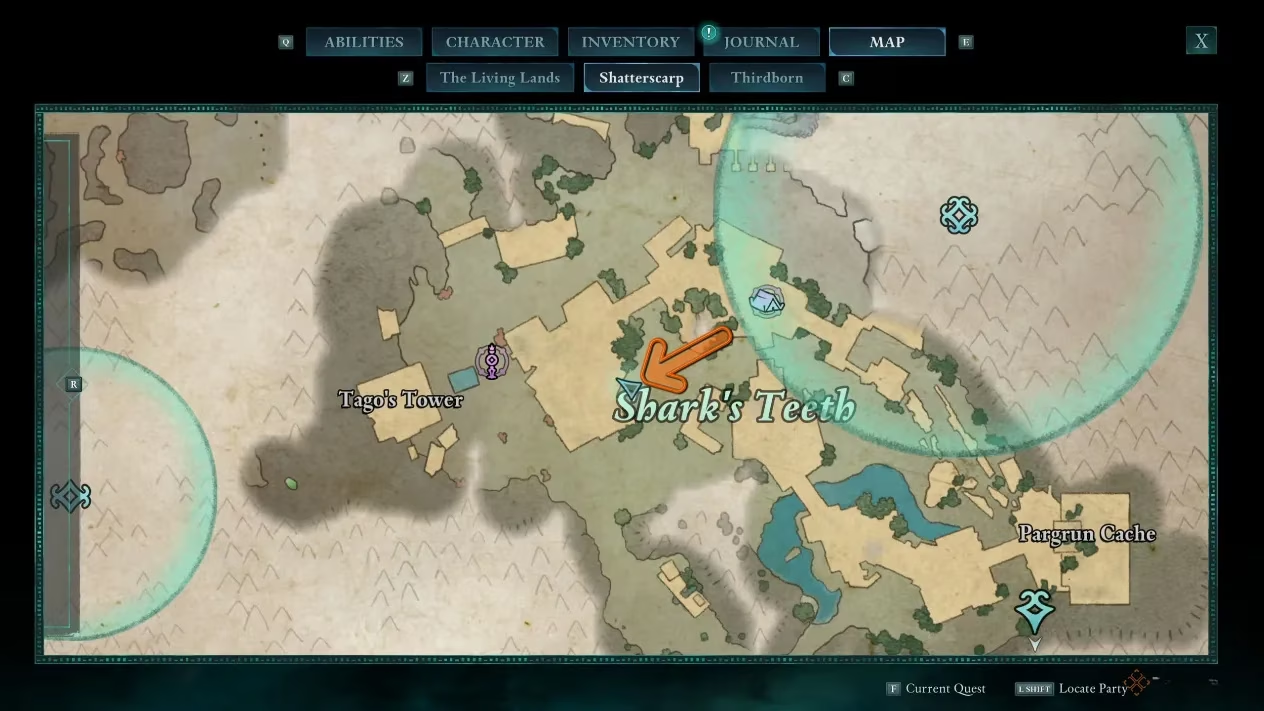
My journey began on the eastern side of the map, in the region marked as Shark's Teeth. Thankfully, the main questline naturally guides you to this area, so you won't be making a special trip just for the cache. I headed to the southeastern part of Shark's Teeth, where I found a remarkably well-preserved structure amidst the ruins – the unmistakable entrance to the Pargrun Cache. Gaining entry was the easy part; I simply navigated down a slope of rubble. The real test, I knew, was waiting inside.
A Step-by-Step Exploration Guide
The interior was a multi-level labyrinth of ancient stone and machinery. Here’s the precise path I took to secure every chest:
-
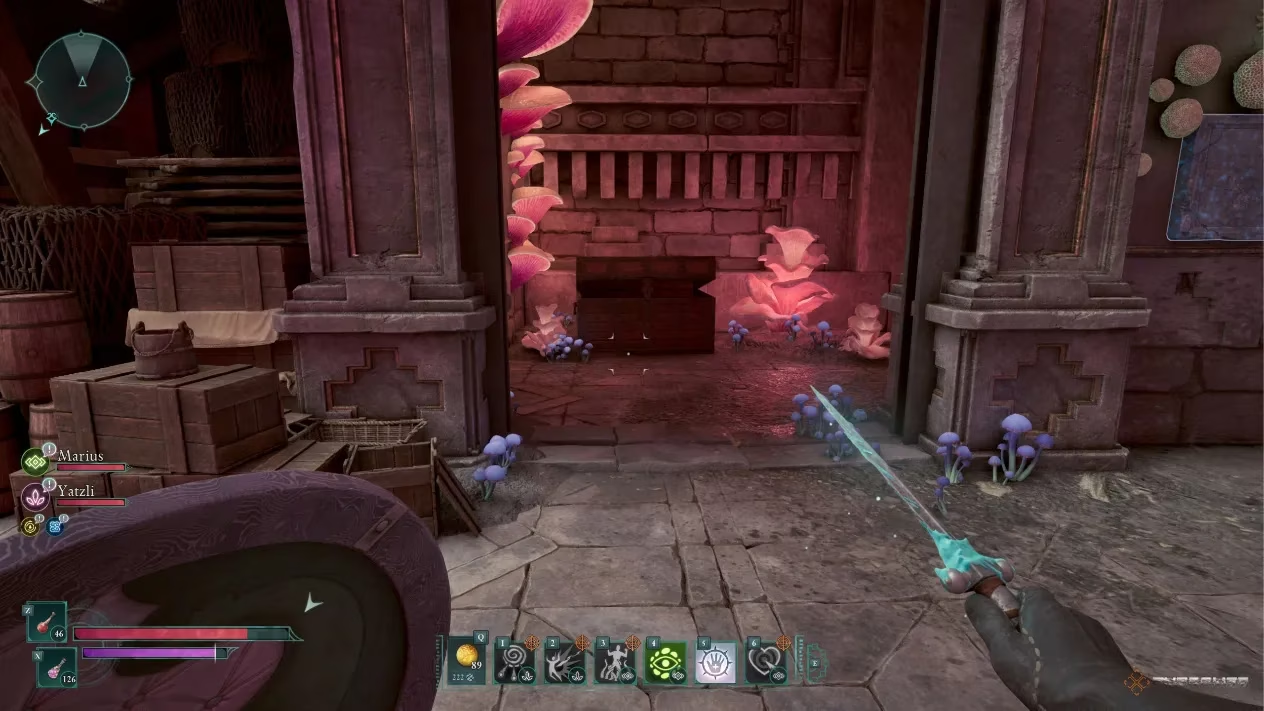
The Initial Prize: Immediately upon entering, I spotted a secluded area bathed in a distinctive purple light. A quick ascent rewarded me with the first chest. A simple start, but a necessary one.
-
Descending to the Puzzle Core: From that high point, I carefully jumped down onto one of the sturdy wooden beams that spanned the central chamber. This vantage point was crucial.
-
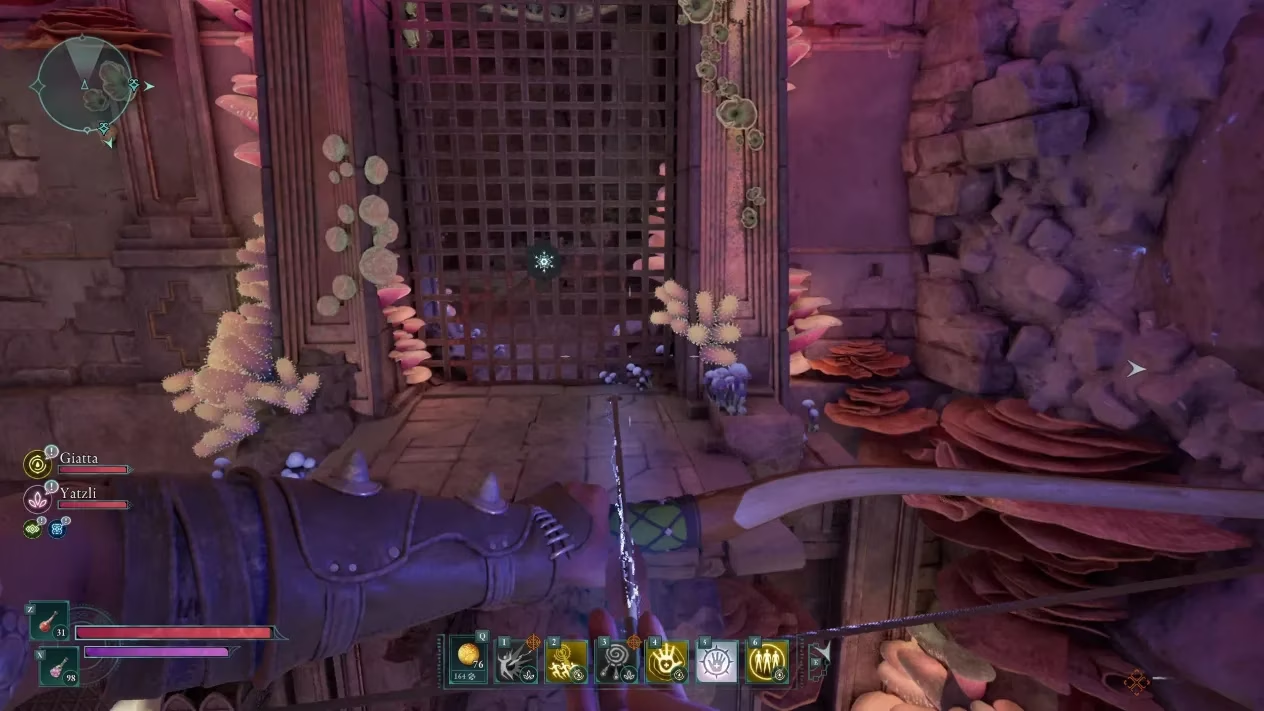
Breaking the Barrier: On the same level as the beams, I noticed a caged barrier. To proceed, this cage had to be destroyed. I found that a frost-enchanted weapon or the powerful Eye of Rymrgand ability worked perfectly. Shattering the ice opened the way to the cache's main puzzle room.
-
Mastering the Lever Puzzle: The central chamber housed a complex mechanism with four levers. This is where many explorers get stuck. After some trial and error, I deciphered the correct sequence:
-
First, I turned the large wheel on the room's right side. This activated the lower door.
-
Then, for the four levers, I set them in this specific configuration: Left Lever UP, Right Lever UP, the other two levers DOWN.
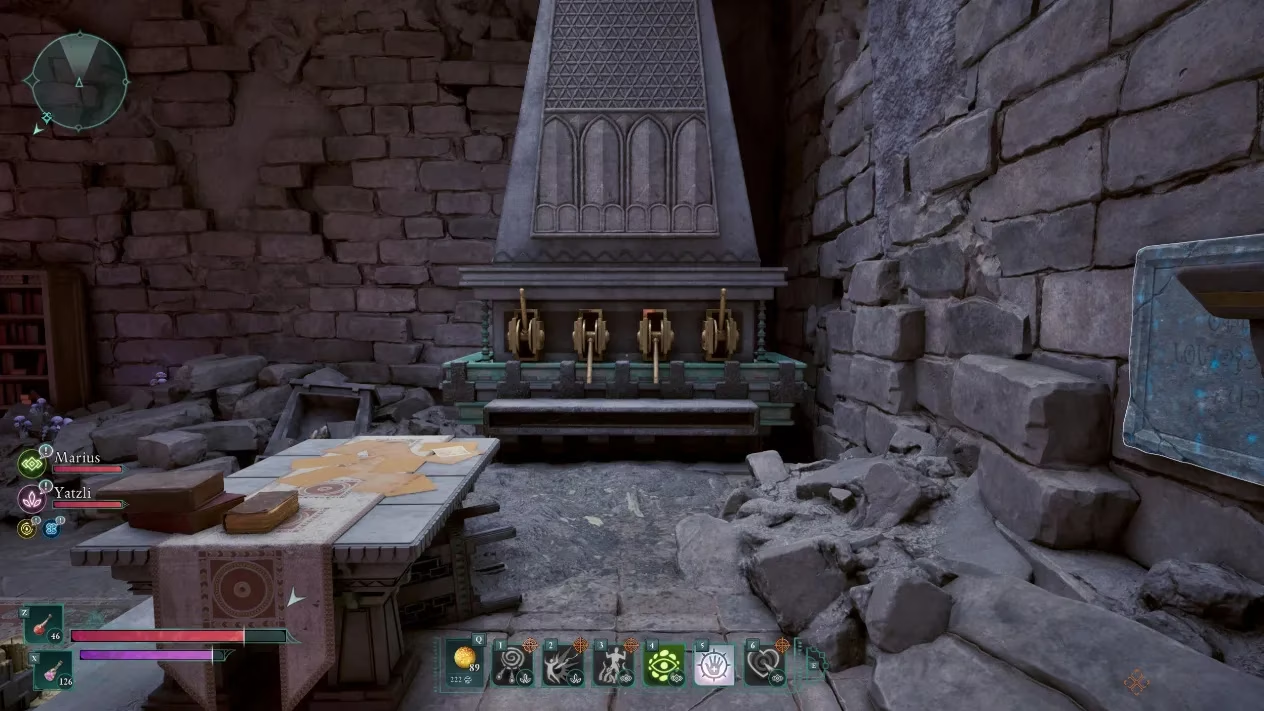
- Success! This combination unlocked the door on my left, revealing a room with a gleaming purple chest.
-
-
The Hidden Chamber & The Key: Inside this new room, I spotted another cleverly concealed entrance. To reveal it, I needed to trigger a switch on a structure to the right of the room. This hidden chamber was the true prize – it contained a glorious golden chest and, most importantly, the Ornate Pargrun Key.
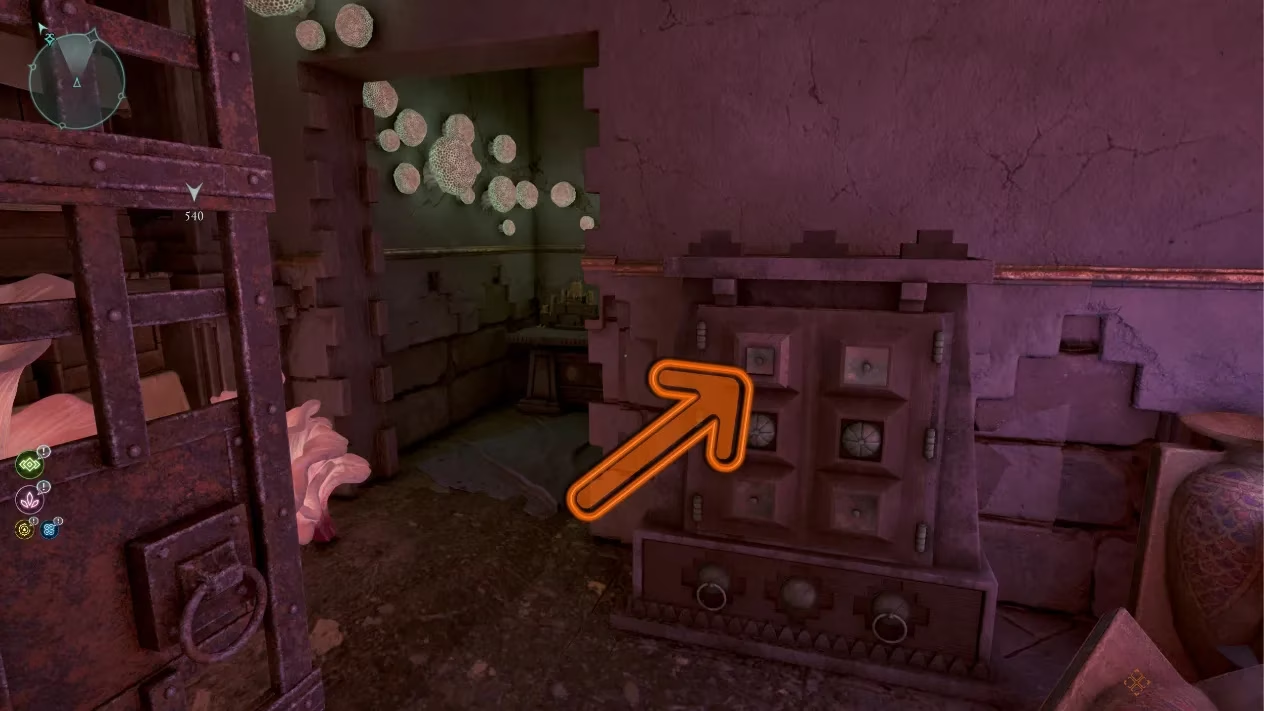
* The golden chest here yielded a rare, unique clothing item, a fantastic find for any collector.
- The Final Confrontation: With the key in hand, I ventured to the lowest level of the cache. Here, a group of guardians awaited. After a fierce battle, I defeated them and claimed the cache's grand finale: the main golden chest. My reward was the Skald's Brigandine, a powerful and unique piece of armor.
The Ornate Key's Secret
Now, what about that ornate key? It certainly looks important. I retraced my steps out of the cache, my mind racing with possibilities. Would it unlock a vault of unimaginable wealth? A legendary weapon? I made my way back to the vicinity of the Shark's Teeth camp, heading to the area just above where "Shark's" is written on the map. Sure enough, I found a massive, imposing locked door.
With a sense of great anticipation, I used the Ornate Pargrun Key. The door groaned open... to reveal a somber scene. Inside was not a trove of treasure, but the final resting place of a Pargrun builder, surrounded by a few purple-rarity items. It was a poignant conclusion to the puzzle—a reminder that not all secrets lead to glory, sometimes they lead to a moment of quiet reflection on those who came before us. The real treasure, it seems, was the challenge itself and the exceptional gear I secured within the cache.
Why This Cache Matters in 2026
Even now, the Shatterscarp Pargrun Cache remains a benchmark for puzzle design in Avowed. It perfectly encapsulates what makes exploration in this world so compelling:
-
Layered Puzzles: It doesn't rely on a single "aha!" moment but a series of interconnected challenges (environmental navigation, combat, logic).
-
Substantial Rewards: The unique armor and clothing items you earn are not just vendor trash; they offer distinct visual styles and potent gameplay benefits.
-
Environmental Storytelling: The final room with the ornate key tells a small, silent story that adds depth to the world.
For any new player embarking on their journey through the Living Lands, conquering this cache is a rite of passage. It teaches patience, observation, and the satisfaction of solving a complex problem. So, gear up, prepare your frost spells, and see if you have what it takes to master the Shatterscarp. The treasures—and the stories—are waiting.